
Forums › Knowledge Base › Recovery Help › Little Dog Harness Attachment
- This topic has 11 replies, 6 voices, and was last updated 15 years, 2 months ago by
 Bret Packard.
-
AuthorPosts
-
2011-01-27 at 4:20 pm #41185
 Bret PackardParticipant
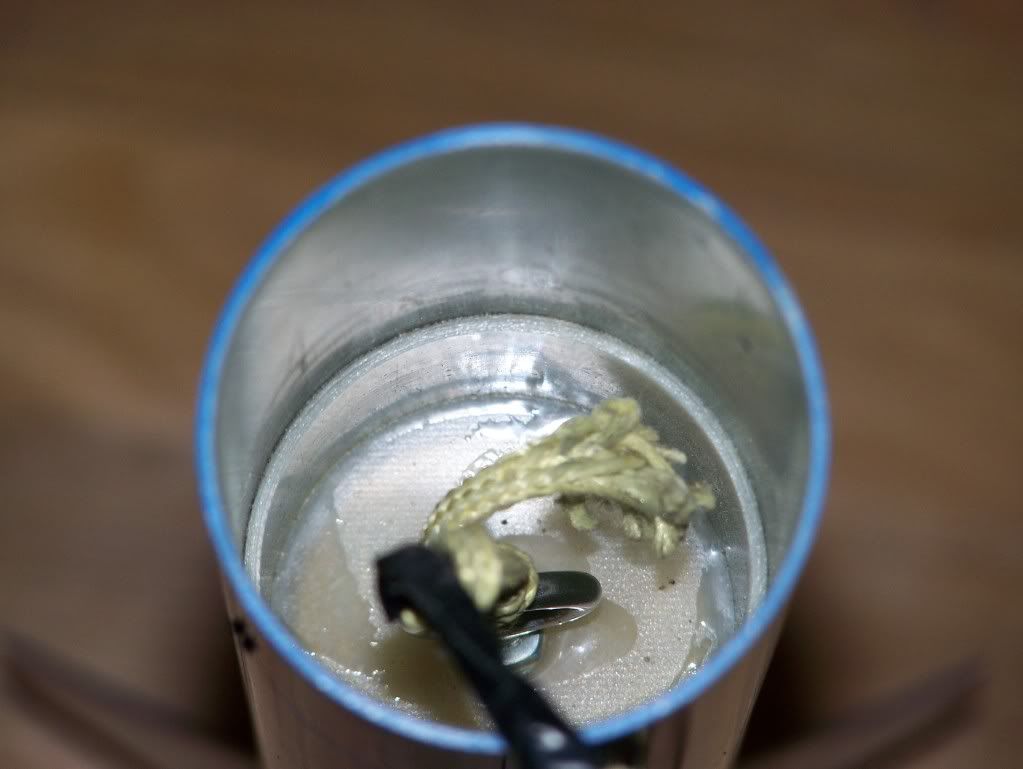
How are you guys anchoring your recovery system on your LD’s? I figure I’ll go with an epoxied eyebolt in the motor ejection well when I fly it DD, but I’d like to be able to fly it motor ejection as well for the times when I’m too lazy to setup for DD. Since my epoxied kevlar strap method got unceremoniously beat down, I’m looking for better alternatives. Pictires are always appreciated.
2011-01-27 at 10:05 pm #53784Warren B. MusselmanModeratorWell, if not an eyebolt in the motor case, my other choice would be to build the booster section zipperless and install the eyebolt in the forward bulkhead.
2011-01-27 at 10:24 pm #53785Bret PackardParticipantI’ve never thought about doing zipperless with motor ejection, are you suggesting drilling holes in the bulkhead?
2011-01-27 at 11:05 pm #53786Bruce R. Schaefer
Bret, L3 isn’t for motor ejection, unless I’m missiing something. As you saw I used a U-bolt and an aluminum plate for stress distribution with a single 3/8″ bolt (?) in the e-Bay. Zipperles has many definitions. The ideal is blowing off everything from the motor mount Eyebolt. On my Crimson Comet, I used a coupler as the “zipperless” part, while couplers in CFG can zip, it’s not likely. And if it does, you have other problems. ???
2011-01-27 at 11:57 pm #53787Jeffrey Joe HintonModeratorDepending on how long your motor mount tube is, if the motor actually sticks up beyond the tube, a hose clamp around the motor pinching the kevlar strap works for retention. Just don’t over tighten to crush the motor case. Binding over the threads is the best location. I’m thinking you’re referring to a Little Dog with either a 38 or 54 power plant? Otherwise, ignore the man behind the curtain.
2011-01-28 at 7:02 am #53788greywolves
Hey guys,
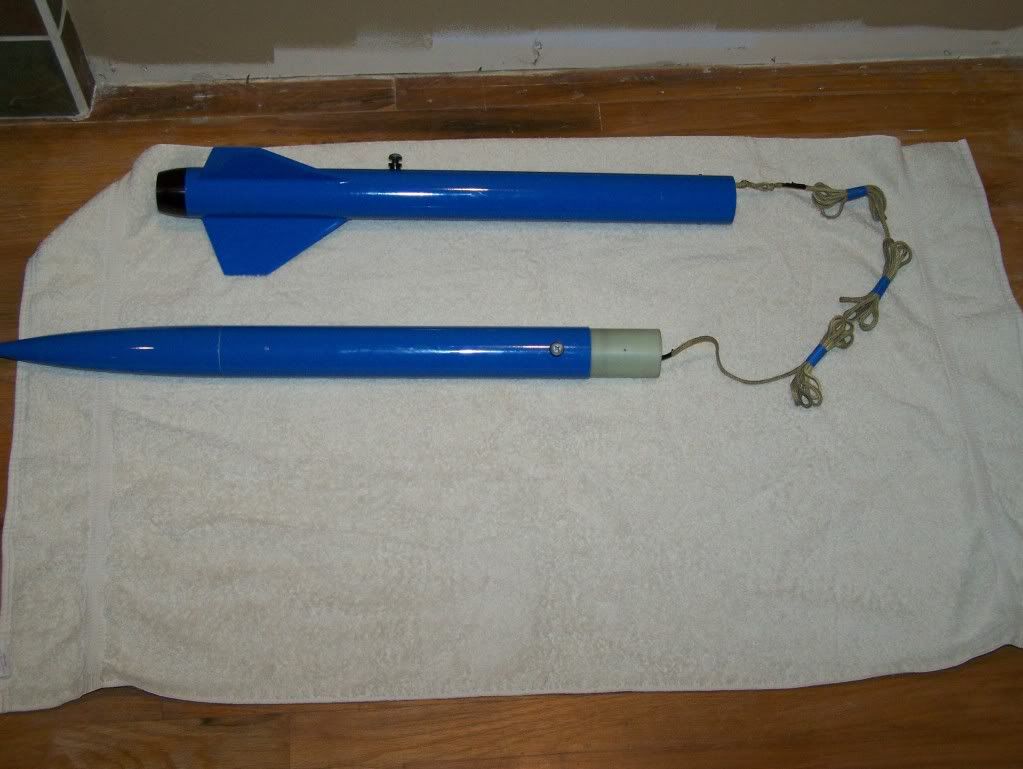
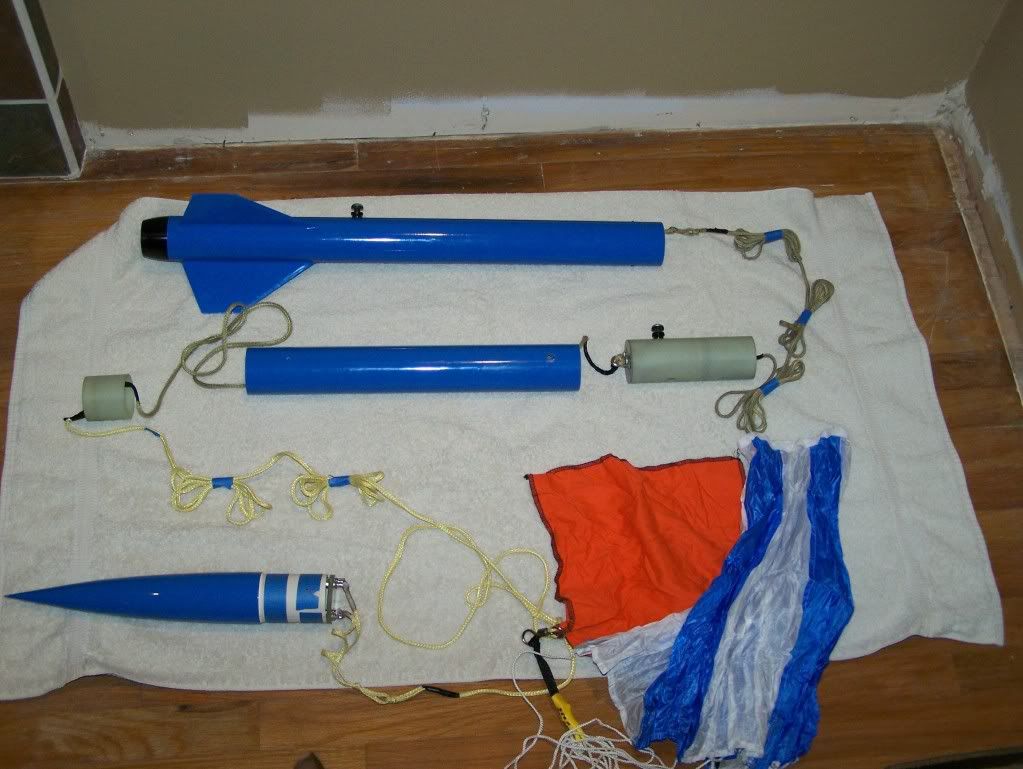
My Little Dawg DD, is DD only. Here are a few pictures of the inside:
I cut 1″ off a coupling, attached a bulkplate to it, then epoxy it in with bulkplate on bottom. Coupler gives more glueing surface area.

Here’s picture of apogee sepration. This is not ziperless design, since the coupler goes with forward tube.
Here’s full deploy. In this picture you notice the coupler not attached, I can remove my launch rail lug, then slide out AV-bay. Launch rail lugs holds it in.
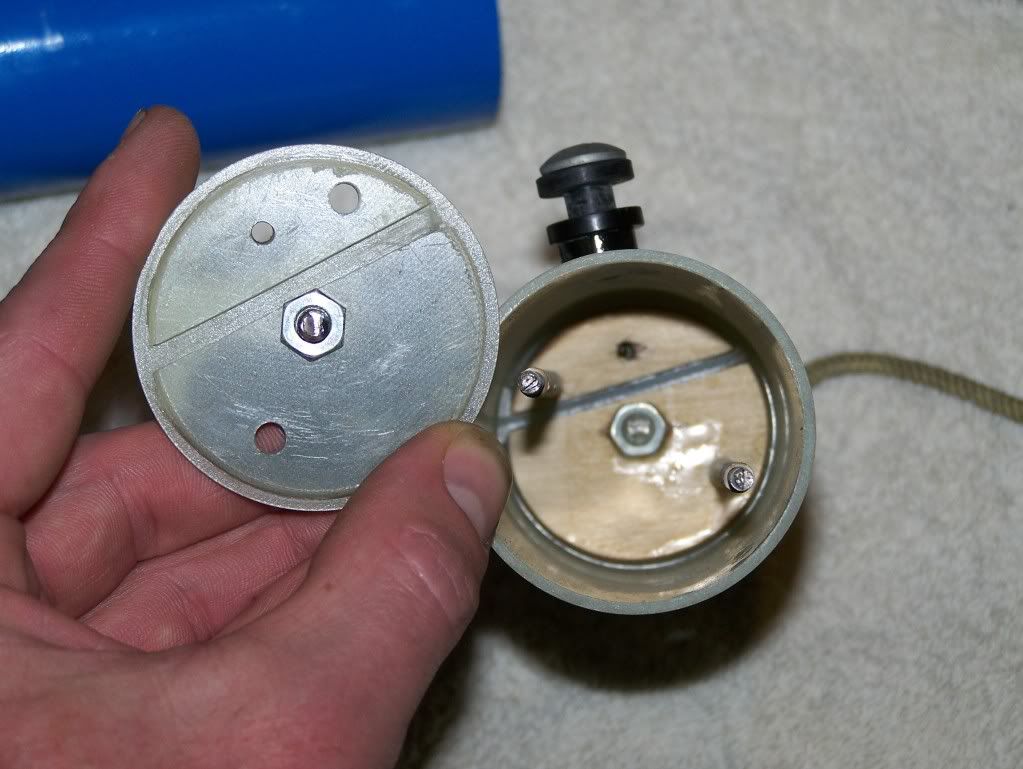
Just a picture of the inside of AV-bay, Raven is mounted to a piece of G10 that slides right into those grooves, with a 9-volt at the bottom, Great fit.
I use 1/3 of gram for apogee, and 1/2 gram for main charges. Knock on wood, this has worked great.
2011-01-28 at 7:06 am #53789Bret PackardParticipantNo Bruce, I wasn’t talking about my L3, just a little 2″ DD kit that JW sells, the Little Dog DD.
2011-01-28 at 1:34 pm #53790Warren B. MusselmanModeratorYes Bret. Drill some 1/4″ or 3/8″ holes in the bulkhead.
2011-01-28 at 2:55 pm #53791new2hprParticipantI’ve heard of some using a short coupler section with a piece of rod or carbon arrowshaft epoxied cross-wise in it. This makes an anchor point that ejection charges can blow past. The drilled bulkhead plate works fine, too, and is probably easier.
-Ken2011-01-28 at 4:19 pm #53792Warren B. MusselmanModeratorHmmm… I like the idea of epoxying in a piece of arrow shaft or something. That would work on a lighter weight bird. You could even drill a hole through the airframe before inserting it and epoxying it into place.
-
AuthorPosts
- You must be logged in to reply to this topic.